I’ve moved my blog to my own domain. Please stop by and visit me there for new content. AngelaWAndrews.com

I’ve moved my blog to my own domain. Please stop by and visit me there for new content. AngelaWAndrews.com
Checking the hash of a file you’ve downloaded from the internet is very good practice. It’s a way to ensure the file you’re downloading hasn’t been tampered with, according to the hash provided on the site you’re downloading from.
Since Powershell 4.0, Get-FileHash has been a way to check the hash signature of a file.

Get-FileHash -Path C:\Path\to\file\file.exe -Algorithm SHA256
Get-FileHash can check the following signatures:
I have (4) new Dell PowerEdge R730xd Ready Nodes that I’m using for a new vSAN 6.6 cluster.
The systems are up to date on drivers and firmware. The controller is a PERC H730 mini, which is supported for pass-through. I installed the hypervisor on the SD card and checked to see if I could see the SSDs from vCenter. The drives weren’t visible.
I SSH’d in the host and ran:
~ esxcli storage nmp device list
It only returned the SD card.
To get your disks to show up in your host, you have to reset the controller. First, put the host into maintenance mode.
Log into the iDRAC. Overview > Storage>Controller > Troubleshooting tab.
Under the actions drop down, select Reset Configuration.

You’ll get a warning. Click OK to confirm.

Once the process is started, you can monitor the job queue’s progress.
When the reset is done, you set the disks to Non-Raid.
Under Storage > Physical disks> Setup Tab, you click on the down arrow under Action-Assign to all.
Select Convert to Non-Raid and click apply. You can monitor the progress in the job queue.

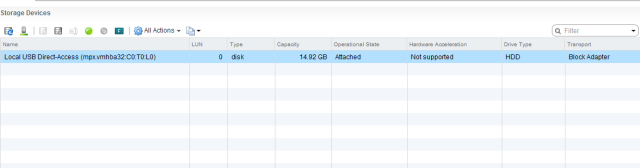
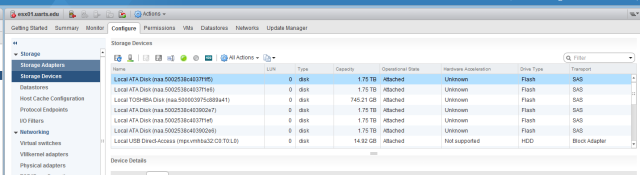
Once it has completed, take the host out of maintenance mode and check the storage devices.
You should now be able to see all of your disks that are now available to the host for vSAN
Users reported that mail stopped being sent from their server.
Tried to test email functionality from the command line.
# echo "Subject: Testing Sendmail from server.domain.com" | sendmail -v admin@domain.com
This is a test
BYE
[ctrl + D]
The message wasn’t sent. I tailed the maillog & checked the service status:
# tail -n 500 /var/log/maillog
# service sendmail status
master dead by pid file exists
I checked to see if any Sendmail processes were running and there were several.
ps -ef | grep sendmail
Stopped the service, deleted the master.pid and the lock file and killed all the sendmail processes, then restarted the sendmail service
# service sendmail stop
# rm /var/spool/postfix/pid/master.pid
# rm /var/lock/subsys/sendmail
# killall -9 sendmail
# service sendmail start
# service sendmail status
Tailed the logs, resent the email and it was delivered.
# watch tail -n 20 /var/log/maillog
I was adding entries to my hosts file on Windows 10 and I got an Access is Denied message when I saved the file in Notepad. Here are 2 quick ways to edit system files.
1) Right+Click Command Prompt or Notepad and Run as Administrator (old faithful)
2) From the Command Line, as Administrator, start notepad.exe “hosts” (from the etc folder of course) or for more bang for your buck, open notepad++ with start notepad++.exe “hosts” if you have it installed.

I’m running WSUS on a 2012R2 server and the drive where the updates are tends to grow a lot. On this VM, I increased the provisioned size of the c:\ drive and not the drive where the updates reside. I didn’t notice I’d touched the wrong disk until I’d rescanned the disks on the VM and saw what I’d done.
As panic set in, I changed the provisioned size back to 60GB (I know, I know) and well, you know the rest. This article saved me today. I didn’t want to restore the VM unless I really had no choice, this did the trick.

Power off the VM and identify the host & datastore that the VM resided on, I enabled SSH and browsed to the VM location.
Cat out the descriptor file (vmname.vmdk) that outlines the data layout on the virtual disk. In the Extend Description section, you’ll see the extent(s) info. Next to RW (if it’s read/write) a number. That number represents the size of the vmdk in sectors, with the additional 200GB included.

To change the sector size to reflect the value I’m shrinking the drive back down to, 60GB, calculate it:
60GB = 60 * 1024 * 1024 * 1024 / 512 = 125829120 sectors
Edit the descriptor file and change the sectors to the new number, save and exit.

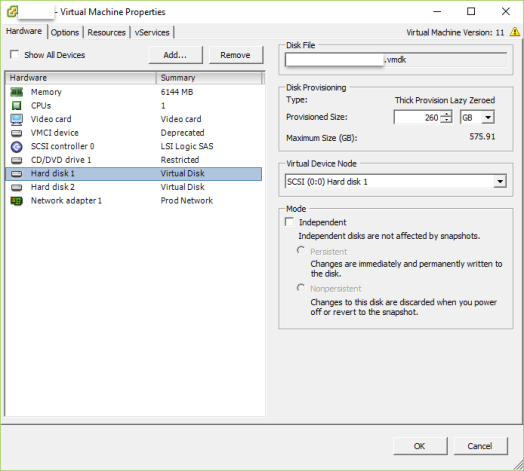
Come out of the directory where the VM resides and VMotion it to another datastore. Review the settings of the vm and take note of the new and improved disk size.

Power on the VM and review the size in Disk Management.
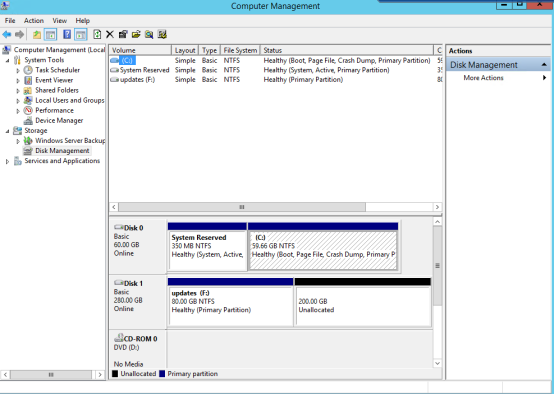
Now, grow the right disk and try not to ever do that again.
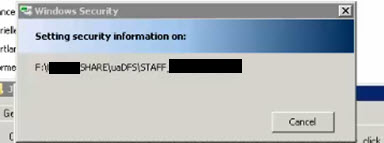
Windows server administration is not without those DOH! moments. How is it that I, the administrator cannot change the permissions on a folder?
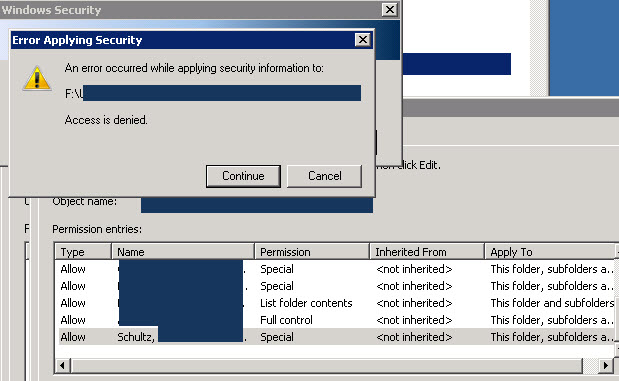
I will not be denied
The easiest way to fix this is to take ownership of the folder using the TAKEOWN command. Takeown is a tool that will allow an administrator to recover access to a file or folder that was denied by reassigning ownership. Open the command prompt and run as administrator.
takeown /f F:\FolderName /r /d y
/f Specify the file name or directory
/r Recurse through all directories and sub directories
/d Prompt with an answer of Yes
Now you can change the permissions as needed.
That’s more like it
I have a newly installed Windows 2012 R2 server and I just added the Windows Server Update Service role. After the install completed, I launched the post-installation task.

The post install configuration failed. I reviewed the .tmp file to see what actually caused the task to fail.
CreateDefaultSubscription failed. Exception: System.Data.SqlClient.SqlException (0x80131904): Login failed for user USERID


![]()
The user is the computer name of the WSUS server.
domain\servername$
I launched SQL Management Studio and located the user referenced in the log file.
After looking at the roles assigned to that database user, I then checked the SYSADMIN server role members and noticed the user mentioned is not listed.

I added the computer name as a member and re-ran the post-installation task.

That did the trick and the post deployment configuration completed without error.

*note*
I’m still testing to see if I can assign the computer a more restricted role other than sysadmin, and I haven’t found any documentation on it, but I’ll keep searching. Maybe I’ll tweet Lawrence Garvin.
I’m running ESXi version 6.1 U1 and Dell Virtual Storage Manager (VSM)version 4.5.2.974. I added a datastore to the cluster using VSM and on 2 of my hosts I got the following alert:


Enables SSH on the host and check out the logs.
In /var/log/hostd.log , I found the error:
warning hostd[xXxXxX] [Originator@6876 sub=Hostsvc.DatastoreSystem opID=123456-789-abc-def user=vpxuser] UpdateConfigIssues: Deprecated VMFS filesystems detected. These volumes should be upgraded to the latest version.
When I created the datastore, I did select VMFS 5, so I wasn’t sure why this error appeared.

According to vmware KB2109735, this is a known issue in version 6.0 and there is no resolution. Just restart the management services and the message goes away.
# /etc/init.d/hostd restart
# /etc/init.d/vpxa restart
Then the message goes away.
This only happens to me when I create a datastore with VSM. If I present a disk from my array, set up the iSCSI connections and rescan, I don’t get this message. Your mileage may vary.
You get a helpdesk ticket that a user needs to be added to an AD group. A quick command in PowerShell is all you need. By the time Active Directory Users and Computers opens, you’re closing the ticket.
Open a PowerShell prompt:
Add-ADGroupMember NameOfADGroup userID09
To confirm the account is there, run this:
Get-ADGroupMember NameOfADGroup | select SamAccountName | sort-object SamAccountName -descending

Be sure to import the Active Directory module.
If using Windows 7 or Windows 10 download the Remote Server Administration Tools & Install.
If your using a server, add the feature, Active Directory module for Windows PowerShell.
If you need to delete a user from a group:
Remove-ADGroupMember NameOfADGroup userID09
